Bacon Brownies! You read it right, Bacon Brownies!

I love bacon. It is salty, smokey, meaty, fatty goodness. Really. There aren’t many things I like better than bacon. Wait…did I just write that? I don’t like any other food better than bacon. Sliced thin and cooked crispy. Sliced thick and cooked ’til it’s still chewy. Bacon Bits. BLTs, hold the T&L. Bacon makes everything better. Trust me, I know. I have a very good friend who made some Maple/Candied Bacon ice cream. Words fail me…sublime, awesome, incredible, stupendous does not begin to describe Little Miss Maple’s ice cream creation. Bacon cornbread. I really could go on for hours about bacon.

Another favorite food group is chocolate. Dark chocolate. Milk chocolate. Chocolate syrup. Chocolate milk. Chocolate ice cream. Chocolate cake with chocolate frosting. Chocolate covered anything. I’ve had Special Dark Chocolate with a super high chocolate liquor and  the partially ground nibs. Ahhh…chocolate.

Now, those of you who know me know that I get bored. When I get bored I usually wander into the kitchen and see what damage I can do. This has brought about such creations as The Whole Hog (pulled pork, ham, & bacon) and the aptly named Widow Maker ( 5 oz Beef Brisket, a double layer of deep-fried pickles, 1/4 lb cheeseburger, 6 oz coleslaw, an over easy fried egg, and several slices of bacon). Yeah, like I said I get bored.

So, three or four months  ago, or so, I whipped up some good, ol’ fashion brownies. You know, the type that uses real chocolate and not cocoa powder, lots of eggs, lots of sugar, and just enough flour to hold everything together. Real brownies. Almost, not quite, but almost like fudge. They were awesome. Really. Awesome. Okay, confession time. I hate baking. But with results like these I’ll bake.

This is where it gets weird. See, before I sampled the brownies I had a bacon cheeseburger. I’m sure you haven’t forgotten, but in case you have, I LOVE bacon. And a bacon cheeseburger is just the thing.

Eating my brownie after having finished my bacon cheeseburger the brownie tasted great. And I started to wonder. Hmmm…what would bacon brownies taste like? I mean, really, what would that be like. I like bacon. I like brownies. What do I have to lose? I’m somewhat cautious, so I decided I’d make a small batch and see what people thought. Well, the people we gave samples to loved them. So, we made a full-sized batch and the sold out in three days. Forty-eight bacon brownies in three days. Looks like we stumbled onto something.

We’ve been selling plain and bacon brownies ever since. Bacon brownies usually sell out in a day and a half. Plain brownies last four to six days. Yeah, seems like a lot of people like bacon brownies. I have bacon brownie evangelist. Really. When a new customer asks about bacon brownies, a people in the restaurant who’ve had then usually persuade others to try ’em. Out of the hundreds of bacon brownies we’ve sold only a few people haven’t liked them.

I’ve since found out that I reinvented the wheel as there are hundreds of bacon brownie recipes online. Mine, however, are among the few that use real chocolate.

So, I thought I’d share my recipe for bacon brownies. Don’t think you’d like them with bacon? Just leave it out.

Smokin’ Will’s Bacon Brownies

Ingredients

5 oz Butter

20 oz Bittersweet chocolate (I use baking chocolate with a Cacao solids content of 64%, but any bittersweet chocolate will work)

4 oz Unsweetened Chocolate

2  TBSP Instant coffee

8 Extra Large Eggs

2 TBSP Vanilla extract

24 oz Granulated Sugar

7 oz Pastry flour (cake flour works very well, and I’ve taken to using AP flour, but this is the original recipe)

1.5 TSP Baking Powder

1 TSP Salt

1 lb cooked bacon (cook it the way you like it. We cook some crispy and some chewy to give it a different texture)

Procedure

Melt both chocolates, butter, and instant coffee in a double boiler (don’t have one? Fill a pot with water and turn on the gas, put chocolate, butter, and instant coffee into a stainless bowl that fits inside the pot.) When everything is melted and mixed together, remove from heat and allow to cool.

While the chocolate is cooling, beat the eggs and when frothy add vanilla. Slowly add sugar, beating until the sugar is melted into the eggs (the mixture might be a little grainy still, that’s okay, as long as it’s not really grainy).

Carefully add eggs to chocolate, stirring constantly to keep eggs from cooking.

Sift the dry ingredients together and slowly stir into batter.

Line a half sheet pan with parchment paper  and spray with pan spray.

Bake at 325F until a toothpick comes just a little sticky. Allow to cool COMPLETELY before trying to cut them. Until the brownies are totally cool they won’t cut very well.

So, let me answer some questions that usually come up. 1. If you let the chocolate cool too much and it starts to harden up you can reheat it until it loosens up. 2. The chocolate needs to be cool enough to stir in the eggs without cooking them. You can jump through the hoops of adding some chocolate to the eggs and mixing in really well (a process called tempering) and then add the eggs to the chocolate, but if you’re careful and watch what you’re doing you can mix the two without trouble. 3. Did you notice I didn’t put in a cooking time? That’s because I don’t know your oven, whether it holds a consistent temps, or has hot spots. They’re done when their done.

You’ll have to tweak this recipe to suit your taste, but it’s worth the trouble. And, if you don’t want to go to the trouble, come on in and try one of ours!

Margaret’s Potato Salad, with a Smokin’ Will’s twist!

I am married to an amazing woman. Really, she is totally amazing. First off she’s stayed married to me for 26 years. No mean feat, as those of you who know me will attest. Second, she has made this great potato salad for years. Longer than I’ve known her. When I say great that’s no exaggeration. People who don’t like potato salad love her’s. Until I learned to make it, just recently, it was the only potato salad I liked at all. I just won’t even try anyone else’s.

So, when we opened Smokin’ Will’s I wanted to do some special side dishes. Cowboy Pintos, Coleslaw, and Margaret’s potato salad. It took me several tries, but I finally got it to taste like hers. And since Smokin’ Will’s is a BBQ joint, I wanted to give it a little twist. Let me tell you about it.

This delightful dish has plenty of good things in it. Red potatoes, onion, celery, mayonnaise, mustard, salt, pepper, and cayenne pepper. Hard cooked eggs, as well. Listen, why don’t I just give you the recipe, shall I?

Margaret’s Potato Salad, with a twist

5 lbs Red Potatoes

Kosher salt

Water to cover potatoes

1 dzn eggs, hard cooked

Hellemann’s Mayonnaise

Prepared Yellow Mustard

Kosher salt

Celery, chopped small

Onion, chopped small

Black Pepper

Cayenne Pepper

Method:

Potatoes

Put 5 pounds of red-skin potatoes in a large pot. Cover with cold water until covered by 2 inches. Add 1/4 cup kosher salt. Put on heat and bring to a boil. Cook until a fork penetrates easily. Remove from heat and run cold water over potatoes until cold. Peel and chop into 1″ chunks.

Eggs

Using your favorite method, hard cook 12 eggs. Cool, peel and set aside.

Dressing

2 cups Hellemann’s Mayonnaise

1/4 cup Prepared yellow mustard, use your favorite brand.

Kosher salt to taste

Black pepper to taste

Cayenne Pepper to taste

Mix mayo and yellow mustard together (I put both into a jar or screw-lid container). Add salt, pepper, and cayenne and mix thoroughly. Taste and correct seasoning to your taste.

Take peeled potatoes, celery, and onions into a large mixing bowl. Add sliced or chopped eggs to mixture. Pour dressing over all and with a spatula, mix until potatoes are completely coated in dressing.  Taste and correct for seasoning.

Cover and refrigerate until chilled.

One of the things we do when we’re serving it to guests and family at home is we hard cook more eggs, slice them, and decorate the top of the potato salad with them. We also sprinkle some paprika on top for color.

This stuff is great for any family gathering, pot lucks, meals, or if you just feel the need to whip up a batch.

If this sounds good to you and you don’t want to go to all this trouble, just stop by at Smokin’ Will’s 821 N Roselle Road, Roselle, IL 60172 (630) 980-2333, for some. We’ve taken the trouble and time to make it for you.

Published in: on November 22, 2011 at 5:02 am  Comments (1)  

Cowboy Wisdom

A lot of you know I grew up in Texas and, in some ways, think of it as home. You also know we’ve opened a BBQ joint called Smokin’ Will’s. I wear my cowboy boots and hat to work every day, ’cause that’s just what I do.

I love the West. From Texas to Arizona and up north to Montana. Favorite movies are Westerns, favorite actor the Duke. There is a lot to learn from that era and people. Here is some of my favorite Cowboy Wisdom. I hope you enjoy it and find it as useful as I do.

Cowboy Wisdom

Never miss a chance to rest your horse

If you get to thinkin’ you’re a person of some influence, try orderin’ somebody else’s dog around.

Don’t worry about bitin’ off more’n you can chew; your mouth is probably a whole lot bigger’n you think.

Only cows know why they stampede.

Always drink upstream from the herd.

If you’re ridin’ ahead of the herd, take a look back every now and then, to make sure it’s still there with ya.

Good judgment comes from experience, and a lotta that comes from bad judgment.

There’s two theories to arguin’ with a woman. Neither one works.

Be thankful we’re not getting all the government we’re paying for.

Never miss a good chance to shut up.

Don’t name a cow you plan to eat.

Life is not about how fast you run, or how high you climb, but how well you bounce.

Keep skunks, lawyers, developers, and bankers at a distance.

Life is simpler when you plough around the stump.

Meanness don’t happen overnight.

Forgive your enemies. It messes with their heads.

Don’t sell your mule to buy a plough.

Don’t corner something meaner than you.

It don’t take a very big person to carry a grudge.

Every trail has some puddles.

When you wallow with pigs, expect to get dirty.

Most of the stuff people worry about never happens.

Don’t squat with your spurs on.

Remember that silence is sometimes the best answer.

Don’t interfere with something that ain’t botherin’ you none.

Timing has a lot to do with the outcome of a rain dance.

It’s better to be a has-been than a never-was.

If you find yourself in a hole, the first thing to do is stop diggin’.

It don’t take a genius to spot a goat in a flock of sheep.

Code of the West

1. Live each day with courage.

2. Take pride in your work.

3. Always finish what you start.

4. Do what has to be done.

5. Be tough, but fair.

6. When you make a promise, keep it.

7. Ride for the brand.

8. Talk less and say more.

9. Remember that some things aren’t for sale.

10.Know where to draw the line.

James P. Owen’s book, Cowboy Ethics: What Wall Street Can Learn from the Code of the West

More Cowboy Wisdom

Never kick a cow chip on a hot day.

When you give a lesson in meanness to a critter or a person, don’t be surprised if they learn their lesson.

Never slap a man who’s chewing tobacco.

When you get to the end of your rope, tie a knot and hang on.

When you’re throwing your weight around, be ready to have it thrown around by somebody else

Like a good cowboy, a good hat just gets better as it gets older.

Always take a good look at what you’re about to eat. It’s not so important to know what it is, but it’s good to know what it was.

Making it in life is kind of like busting broncos. You’re going to get thrown a lot. The simple secret is to keep getting back on.

There are more horses asses than horses.

Never ask a barber if he thinks you need a haircut.

The easiest way to eat crow is while it’s still warm. The colder it gets, the harder it is to swaller

The biggest troublemaker you’ll probably ever have to deal with watches you shave his face in the mirror every morning

Lettin’ the cat outta the bag is a whole lot easier than puttin’ it back in.

You can’t tell how good a man or a watermelon is ’till they get thumped

If you like these, let me know. If you don’t like ’em keep that to yourself!

Will “Smokin’ Will” Sahli

Published in: on October 10, 2011 at 7:26 pm  Comments (1)  

Cowboy Pintos

So, have ya’ll missed me? I’ve sure missed you. Owning a restaurant can, and does, consume your life and time. Smokin’ Will’s opened May 6th and started selling BBQ on June 13th. Right now we have Brisket, Pulled Pork, and Smoked Chicken Breast sandwiches and salads with your choice of meat and dressing. We’ll be adding a Texas Sausage, Baby Back and St Louis cut ribs, and whole Smoked Chicken soon.

We’re also adding sides to the menu. We’ve added coleslaw, sweet potato fries, and Cowboy Pintos. We’ll be adding potato salad soon and might be adding corn bread. We’ve kept french fries and all the possible combinations like cheese fries or chili fries.

What I want to talk about right now is Cowboy Pintos. The beans, not the horse or the car. Okay, so ya’ll get the horse, right? But, car, Will? Huh? Remember the Ford Pinto? It was an underpowered, but somewhat sporty compact from Ford, trying to capitalize on the popularity of the Mustang. They made lots of ’em. Okay, so what does this have to do with Cowboy Pintos, you ask? Well, just like Ford, we make Pintos, Cowboy Pintos, and we make a lot of them. And like the Ford, our Pintos are sporty and have some zip.

Honestly, when we started adding BBQ to our menu, I couldn’t wait to add these beans. They belong with BBQ. When I think of the perfect BBQ meal, I think of Brisket or Pulled Pork on a good bun, creamy coleslaw or potato salad, and beans. Beans show up everywhere with BBQ.

There are tons of bean recipes out there. Some use kidney beans, black beans, white beans, and combinations of the above. There are many styles of beans, as well. We call ours Cowboy Pintos, because they’re very simple and very much like the mess of beans you might have been served on a cattle drive. Simple and filling, with lots of flavor, and not like any other beans you’ll find out there.

Now, some of you love beans but they don’t love you. You know who you are and you know what I mean. Well, our beans don’t produce much of that infamous side effect because we know how to cook them properly. Beans contain oligosaccrides, very complex sugars that don’t break down very well until they hit your large intestine, where bacteria break them down, producing, as a by-product, gas. There are commercial products that can be ingested with beans to counter the gas, but the best, and simplest way is to cook them properly in the first place.

To cook beans properly is very simple: put beans in a large container with water to cover by 4 inches , soak over night in the refrigerator. Pour water off and add as much water as recipe calls for. The important thing to remember is to pour off the water you soaked them in. That water contains a very large percentage of the oligosaccrides and you sure don’t want to use it to cook in.

Cowboy Pintos

Ingredients

1 lb dried Pinto beans, soaked overnight and then drained

8 cups cold water

12 oz Dr. Pepper (okay so on a trail drive this would be molasses, but I love Dr. Pepper)

14.5 oz can of crushed tomatoes

2 medium onions, chopped

4-5 slices thick cut, smokey bacon, chopped

3 Tbsp Chili Powder

2 Tbsp Worcestershire Sauce

1 Tbsp Ground Cumin

4 cloves garlic, minced

3-4 fresh serranos or jalapenos, or combination, chopped

Burnt-ends of Brisket (that wonderful, dark, crunchy part of the brisket with so much smokey/beefy flavor) to taste

Salt to taste

Method

Soak beans over night in the refrigerator. Drain beans and discard water

Add everything but salt to pot, heat to boil, reduce to simmer. Reduce until thickened, but still soupy, adding salt toward end of cooking time.

These beans are great right out of the pot the first day, but for the best results cool them overnight and reheat the next day. You’ll be glad you did, since all the flavors combine and meld together overnight. They’re a perfect accompaniment to your summer grilling or any time of year. Easy to make and great tasting. Or, perhaps you want these Cowboy Pintos but don’t want to go through the hassle. Come on over to Smokin’ Will’s, we’ve usually got a pot of these ready to go.

Carolina Style Mustard BBQ Sauce

Let me see some hands! Who’s ever had Pulled Pork in South Carolina, or parts of Georgia? Okay, raise those hands high! So those of you who did, what’s the most distinctive difference between Carolina Pulled Pork and everywhere else? You! Way in the back! Speak up I can’t hear you. What? Bingo!!! That’s right, South Carolina and parts Georgia use a yellow mustard based BBQ sauce.

Mustard based BBQ sauces were developed by German immigrants who came to the region in the 18th Century. They were used to that type sauce back in Germany, so they brought it with them. Well, everyone in that part of the country cooks a lot of pork. I mean a lot of pork. And those German immigrants combined their mustard sauces with the pulled pork and an amazing transformation occurred! That smoke cooked pork, already an amazing taste treat by itself, moved up to an alternate plane of existence! The bite of the mustard and the fruitiness of the apple cider vinegar combined to make an awesome sauce that made the pork shine like gold, okay the yellow mustard accounts for the gold color, but it still shines!

Our sauce is based on several recipes. I couldn’t find one I really liked, so I combined two. It’s sweet, tangy, and has a bit of a bite to it. This stuff was designed specifically for Pulled Pork, but is pretty good on anything you would put mustard on. We have people who put it on hot dogs and rave about it. There is also a growing number that dip their french fries in it. But, seriously, it doesn’t matter what you put on, it’s just plain good!

Caroline Style Mustard BBQ Sauce

Makes 2 cups

1 cup yellow mustard, any inexpensive yellow mustard will work

¼ cup honey

¼ cup dark brown sugar

¼ cup apple cider  vinegar

½ teaspoon coarse black pepper

¼ teaspoon onion powder

¼ teaspoon cayenne

Combine everything in a sauce pan large enough to hold it. Whisk everything together until well combined and put on heat. Bring to a boil and then reduce to a simmer. Simmer about 10 minutes or until reduced by 25%. Cool, bottle in a squeeze bottle, and refrigerate. Avoid the temptation to use it for 24 hours, so the flavors can blend together.

If the sauce sounds like something you want to try, but you don’t want to make it yourself, come on in and you can put it on anything on our menu!

Smokin’ Will’s

821 N Roselle Road

Roselle, IL 60172

Phone – (630) 980-2333

Kansas City Style BBQ Sauce

So, today we added Pulled Pork sandwiches to our menu here at Smokin’ Will’s. Wait! What? What’s Smokin’ Will’s? Where’s Smokin’ Will’s? Why am I just hearing about Smokin’ Will’s now?

Smokin’ Will’s is a hybrid Hot Dog Joint/BBQ Shack. We’ve only owned the place since May 6, 2011 and we’ve been feeling our way about, since. Smokin’ Will’s is the start of fulfilling my dream to serve BBQ to the masses! Hear that, masses? I expect you all to be lining up in long lines to just get a whiff of the BBQ! You’re just hearing about it now because things are starting to fall into place for us. We have  Facebook page (Smokin’ Will’s. Go ahead & push like. You know you want to) and a website soon to follow. Tee-shirts have been designed and a menu is being written to incorporate the BBQ to the Hot Dog menu. It’ll be completed shortly.

Okay, back to the Pulled Pork sandwich special.  You get a large Pulled Pork sandwich, large fries and large soda for $7.49. Very good price, if you check around, and it’s a good sandwich (modesty keeps me from telling you that it’s AWESOME). I’ll tell you how to cook the pork later because I want to tell you how to make the sauce. This is really good sauce. It’s sweet, smokey, thick, and spicy. And it’s made right here at Smokin’ Will’s!

There are several types of BBQ sauce that work well with pulled pork: Golden Mustard style (made with, you guessed it, yellow mustard), Vinegar based, and Kansas City style.

Odds are that if you like real BBQ, then the sauce you’ve put on your Q has been a Kansas City (henceforth simply KC) style sauce. Do you like KC Masterpiece? How about Sweetbaby Ray’s? Ever eat at Famous Dave’s? If you like those sauces then you like KC style sauces. They are, by far, the most popular type of sauce. You can go to the store and pick up a bottle of KC style sauce cheap, but you’re reading this because cheap and easy isn’t really fun, is it?

You’ll need to assemble some spices and a nice sauce pot to make this lovely stuff. The ingredient list is below:

Kansas City Style BBQ Sauce

Makes about 4 cups

2 cup ketchup

1 cup brown sugar

1/2 cup red wine vinegar

4 tablespoons molasses

4 tablespoons dark corn syrup

1 tablespoon butter

1 teaspoon liquid smoke

1/2 teaspoon kosher salt

1/2 teaspoon coarse black pepper

1/2 teaspoon paprika

1/4 teaspoon chili powder

1/4 teaspoon garlic powder

1/4 teaspoon minced onions

1/4 teaspoon cayenne

Combine all ingredients in a sauce pot large enough to hold them. Put on heat and cook until reduced by 1/3. Cool and refrigerate before using.

There, wasn’t that simple? The only thing that’s more simple than that is driving over to Smokin’ Will’s, where the sauce is already made and there’s pulled pork to put it on!

Pizza Tonight!

Okay! Show of hands: how many of you like pizza? Right, most of us do, don’t we. How many of you think that pizza was invented by Italian-Americans in the 20’s and 30’s? Yeah, I did too. It just didn’t seem that authentic to me. I’ve heard the stories about some guy opening a small place and inventing pizza. Well, I’ve found out that’s just not true. Here’s a little bit about pizza’s history.

Pizza is basically a flatbread, with stuff on it. If you took a pita and kept it flat, then piled gyro meat, onions, tomatoes, add zatziki  sauce, you would have something similar. So, pizza is a flat bread from the Mediterranean countries, specifically Italy. The word pizza is thought to be a corruption of the Latin word pinsa, which means flatbread.  Pizza has been around for a long, long time. Don’t laugh, but a pizza  from the Bronze Age, around 1700 B.C., was found recently. Talk about cold pizza, right? Anyway, pizza is an old food.

It didn’t start to look like modern pizza until the 18th and early 19th century that pizza really started to look like it does today. The Italians had tomatoes (an import from North America)  as early as 1530, but like most people of the time, they raised them as ornamental plants because they thought they were poisonous. Anyway, once the poor of Italy discovered that tomatoes weren’t poisonous Italian cuisine changed forever. Hurray!!!

Another thing that changed Italian cuisine forever and pizza specifically, was the importation of the Water Buffalo from India. Italians, along with several cultures, have the habit of taking the milk from a whole lot of animals and turning it into cheese. They have done so with Water Buffalo milk. It’s called mozzarella di buffalo and it totally transformed pizza. Fresh mozzarella makes an amazing difference on pizza. Really, everything on pizza should be fresh, when you get down to it.

Well I have a recipe for pizza that I like fairly well. I don’t use fresh ingredients, but they can be substituted in place of what I used. So, here it is.

Pizza

Crust Ingredients:

Bread Flour      48oz

Warm Water     28oz

Yeast                  1oz

Salt                     1oz

Olive Oil             2oz

Process:

Add water, flour, Olive oil, and yeast to mixer bowl. Mix on low for 4 minutes.

Turn mixer on to 2nd speed and add salt. Mix for 4 minutes.

Dump dough onto a clean surface and round. Cover with plastic wrap and rest for 30 minutes.

Scale out to 6oz pieces, round, put on a sheet pan, cover with plastic wrap, and proof in cooler for 20 minutes.

Remove from cooler and roll out thin. Cover with sauce of your choice add toppings like sausage or pepperoni, cover with cheese and bake in a 350 oven until done.

Published in: on February 14, 2011 at 4:39 am  Comments (2)  

Ah, there’s the rub!

Okay, some of you think Bar-B-Que season is over. To that I say: Wrongo!! Bar-B-Que season is everyday! Anyway, here is the recipe for my #1 go to rub for anything: pork, beef, chicken, you name it, this rub will work on it. I promise!

Will’s #1 Rub

3/4 cup Smoked Spanish Paprika

3/4 cup Dark Brown Sugar

1/4 cup Ground Black Pepper

1/4 cup Kosher Salt

2 Tbsp Chili Powder

2 Tbsp Garlic Powder

2 Tbsp Onion Powder

2 Tsp Cayenne

Put all ingredients into a medium sized mixing bowl and thoroughly mix together, being sure to break up any lumps. Store in air tight container. To use put on a pair of latex gloves (the Paprika will stain your hands) and apply to meat, being sure to “rub” it in. Shake any excess. Put meat into the refrigerator for at least 3 hours and up to 24. Bring the meat up to room temp before putting it either on the grill or in the oven.

One more tip: real Bar-B-Que is always smoked and cooked at a low temp (200-250 degrees F) for a long time. If you don’t have a grill, you can still get good results in the oven, just use a little liquid smoke before you put the rub on. Let it dry a little then apply the rub.

Enjoy

Published in: on February 12, 2011 at 6:09 am  Leave a Comment  

French-style Bread

So, some of you (not very many, by the way) read my post about Crème brûlée, and will remember that I said that I hate making pastries and desserts. Well, don’t think that my dislike of pastries extends to all baking. I love baking bread. There is nothing quite like the smell of fresh bread baking in the house, and it’s fairly simple. Okay, I just said baking bread is simple, well, that’s not really true, I should have said that it’s easy.  Allow me to explain.

Basic bread is composed 4 basic ingredients: flour, water, salt and yeast. You can vary things around a bit and add things, but basic bread is basic bread. That’s what I tell you about. To talk about this in a way that will help you understand the process better, I going to use some terms that professional bakers use. Here goes:

Autolyse: a simple process of adding the water to the flour covering it with plastic wrap and walking away for 20 minutes. During the Autolyse process   the flour is fully hydrating (sucking up all that water) and gluten strands are forming, More about gluten in a minute.

Fermentation: the process of yeast digesting water and flour to create co2 gas. It’s the co2 that causes the bread to raise. The gluten strands are the supporting framework. Home bakers call that the 1st rise. Bakers call it fermentation because it is the same process that turns all that grain and stuff into beer.

Gluten: see, I told you we’d get to this. Gluten is strands of protein that form when you add water to wheat flour. When you knead the dough that forms you increase the number of strands of gluten, strengthen them, and make them longer. These strands of gluten are what give the bread it’s structure.

Rounding: rounding is the process of of taking the ball of dough, cupping  your hands around it and dragging it across a clean table or counter until it forms a nice ball with the skin on top nice and smooth.

Proofing: the process of taking the shaped loves, covering them with plastic wrap and letting them raise again. What home bakers call the 2nd rise.

Oven Spring: the effect of heat on the live yeast-beasties, which causes the loaf to “spring” into a larger shape.

Yeast: a single celled organism, technically classed as a fungi, used in the fermentation of bread and alcoholic beverages. The same species, Saccharomyces cerevisiae is used in both. I call these little guys yeast-beasties.

Formulas: bakers, especially bread bakers, don’t use recipes, they use formulas. They talk about ratios and percentages. So, we’ll also talk about formulas, okay? For a better understanding of the whole ratio/percentages thing go back and look at the January 18, 2010 post called “Playing the Percentages”. It spells the whole thing out.

So, shall we venture forth and follow a simple/easy formula and bake some bread?

French-style Bread

Equipment:

A Stand mixer: I use a stand mixer to knead the dough, it’s quick and easy. If you don’t have a stand mixer and are thinking about getting one, this would be a good time to go right out and buy one. We’ll wait. While we’re waiting, let me tell you that if you don’t have a stand mixer and don’t intend to buy one, you will be developing some pretty powerful upper body strength by kneading by hand. Ah, I thought so. The rest of us will wait until you also get back from the store with your new, shiny mixer.

1/2 Sheet Trays: sometimes called cookie sheets. they need to be large enough to hold 2 baguettes.

Big Mixing bowl:  1st use is for mixing the dough, if you don’t have a nice shiny stand mixer. 2nd use is for fermentation.

Bench knife or scraper: to scrape dough off the counter or table and to cut dough into pieces.

Digital scale: one that will show ounces and pounds, with a capacity of over 10 lbs.

Instant read Digital Thermometer: you’ll use this for more than just baking.

Parchment paper: cut to fit the 1/2 sheet pans

Spray bottle filled with water

Pie tin

Razor blade:

Formula: to slash top of loaf with

48 oz Bread flour

28 oz warm water (temp should be between 70 and 85 F)

1 oz kosher salt

1 oz dry active yeast

Process:

Combine flour and water in mixing bowl and mix until the dough is a mass (if using a stand mixer, use a dough hook; if mixing by hand, mix with a wooden spoon) Autolyse the mass.

Put mixer on 1st speed and add yeast, and knead for 4 minutes. If working by hand, turn dough out onto floured surface, flatten dough, sprinkle yeast on top and kneed by hand for 10 minutes, folding the dough in on it’s self and rotating 1/4 turn every time.

Put mixer on 2nd speed and add salt and knead for 4 minutes or so, or until the temp of the dough is around 80F. If kneading by hand add the salt and knead until internal temp of the dough is around 80F.

Remove dough and round it, then place in a bowl or container, spray with nonstick spray, cover with plastic and lace in a warm place until doubled in size.

Remove from bowl and gently release the built up co2, this is called  “Punching down”, but don’t be violent with the dough, just deflate it.

Using your bench knife or a sharp knife, cut the dough into 13 oz pieces, round, cover with plastic

After all the dough has been rounded, one by one flatten and elongate the dough into a rectangle. Fold one of the long sides in about a 3rd of the way across, and using the heel of your hand push on the seam until it’s closed. Turn the dough around and do the other side. Using your thumb and forefinger, pinch that seam closed.

Turn the bread seam side down and with your fingers splayed out, start rolling the bread into a 20″ long tapered loaf. Do that for all the loaves, put on parchment paper covered 1/2 sheets, cover with plastic wrap and let proof for 20 to 30 minutes.

Place a pie tin in the bottom of your oven and fill it with water, turn stove on to 500F

Using the razor blade, make 3 long slashes about 1/4″ deep in the top of every loaf. This gives the steam that builds up some place to escape.

After oven comes up to temp let it sit for 10 to 15 minutes, to make sure it is really there. Refill pie tin if necessary, and spray water into the oven. After 5 minutes place bread in oven and spray walls of oven with water. Open the door and spray again with water after 3 minutes.

So, you’re asking, how do we know when the bread is done? Several ways: 1st the color of the bread will be a nice golden brown, 2nd the loaf will sound hollow when you thump the bottom, 3rb, and the best, by the way, an instant read thermometer will read 190 F when the bread is finished baking.

Put the loaves on a cooling rack and allow to cool completely. Really, I know you want to eat it hot out of the oven, but all you will taste is gummy flour and steam. This is a fairly decent bread and should really cool completely before eating.

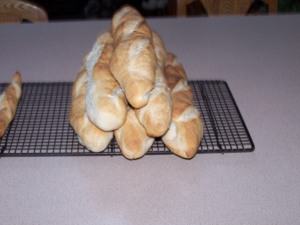
Fresh loaves, cooled off and ready to eat
Published in: on January 31, 2011 at 8:48 pm  Comments (1)  

Crème Brûlée

How many of you know about my feelings regarding pastries and desserts? Right, I hate making them! They make me crazy! They are so easily ruined, or take way too much attention. I just don’t like making the doggone things! Have I mentioned that at my last position as a chef I was the Pantry Chef? And that I made, aside from all the salads and cold appetizers, the desserts? God has this great sense of humor!

There are some desserts that I actually enjoy making. These include brownies, pecan pies, Key Lime pies, and Crème brûlée. That’s right, Crème brûlée. I know, it seems so…so…so…Girly. Can’t help it. I love eating the stuff. I love making the stuff. I really love serving the stuff. Crème brûlée! Who’da thunk it? Not me, never in a million years.

Do you know what Crème brûlée is? I didn’t until I went to Culinary school, I know, pathetic, right? So, Crème brûlée is French for burnt cream. Sounds appetizing, doesn’t it. Okay, so what it really is , is this really rich custard with caramelized sugar on top. The custard is usually flavored with Vanilla. The best uses whole vanilla beans, with the seeds scrapped out and cooked into the custard.  It, the custard, can also be flavored with lemon or orange zest, chocolate, coffee, and other fruit flavors. For my money, the vanilla version is the best, and since this is my blog, that’s what we’ll be making. Okay?

So, here we go:

Crème Brûlée

11 large egg yolks (you can save the whites and freeze them for later use)

1 qt Heavy Cream (at least 32% fat content)

1 cup granulated sugar

1 vanilla bean

2 qt non-reactive sauce pan (Stainless steel or nonstick)

Large non-reactive mixing bowl (stainless steel is best)

1/2 sheet pan

Butane torch

Preheat the oven to 325 F

Separate the eggs, putting the yolks into a nonreactive bowl (stainless steel or glass, not aluminum as it will discolor the mixture) This is where you could set aside the whites for later use.

Pour qt of heavy cream into a non-aluminum sauce pan and turn on to medium heat, watching to make sure that the cream doesn’t boil over. You do, however want it to come to a rolling boil, stirring to make sure it doesn’t burn.

Split the vanilla bean down the center and scrape the seeds into the boiling cream, along with the seed pod.

Meanwhile whisk the eggs to the ribbon stage. Slowly add the granulated sugar and make sure that it’s incorporated into the eggs. The sugar should melt.

Slowly temper the cream into the eggs. Go slowly otherwise you will scramble the eggs. Whisk constantly as you temper in the cream and continue to whisk for at least 1 minute after the entire contents of the cream pot is in the egg bowl. You will see little black specks in the mix, along with the seed pod. Don’t worry, the specks should be in there, you can, however remove the seed pod. If you put that pod into a quart of milk and leave it over-night, you can put a little sugar in and have vanilla milk.

Take a ladle and pour uncooked custard into 4 oz ramekins. Place ramekins on a 1/2 sheet, place in oven and carefully add enough water to come half-way up the sides.

Bake until the centers are still jiggly. Remove and cool quickly. Keep refrigerated until quite cold.

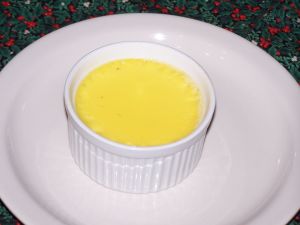
Right out of the oven

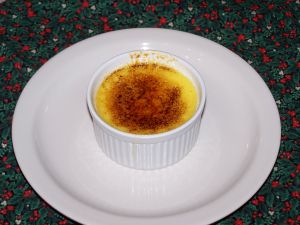
To serve, remove from fridge, sprinkle sugar on the top and caramelize the sugar with the torch or by placing under the broiler. Be careful not to burn the sugar too badly.

Nicely Caramelized Sugar

So there you have it! Crème brûlée. See, isn’t that easy? It must be ’cause I can do it and I hate dessert making.

Published in: on January 7, 2011 at 12:08 am  Leave a Comment